As a research institution, you can integrate ORCID into your ETD systems, embedding the ORCID iDs of students and, where relevant, advisors or reviewing committee members into your ETD metadata to enable the iDs to be used throughout the ETD publishing workflow.
- The student submits their thesis or dissertation submission to their research organisation
- The research organisation collects the authenticated students ORCID iD and requests permission to interact with their record, and stores that permission.
- Use the information from the ORCID record to help populate the students profile in your system
- Displaying iDs within your ETD system within the students profile page
- When the final e-thesis/dissertation is available the ORCID iD should be included within the metadata. Doing this means that your students’ ORCID iDs will be searchable in databases which support this, such as your institution’s repository.
- Add the thesis/dissertation to the students ORCID record.
Example


Benefits
Using ORCID in your eTheses or dissertation submission process is good for your institution and your students alike. It enables you to create validated connections between your students, their EDTs, and their affiliation with your institution, which makes them and their ETDs more discoverable in turn. You can also use data from the ORCID record to populate their profiles in your ETD system to save the researcher time having to manually enter data that is already available. You will also be helping to build trust in scholarly communications
More information
The basics
Items (works, employment, funding, peer review etc) can be added to an ORCID record either manually or using the ORCID member API. If you are an individual looking to update your record check out our help section on this here. If you are a member looking to add items to an ORCID record, you will need the following:
- The researchers permission
- Member API credentials
- And either:
- A vendor system that integrates with the ORCID Member API
- Your own system that integrates with the ORCID Member API
For a complete guide for members using the API to items to a record check out our API tutorial link below:
To support the social component we offer a toolkit of Outreach Resources to help you develop a campaign to support your integration, and communicate to your researchers:
- What ORCID is.
- Why your system collects iDs and how your system will perform tasks, such as updating their records.
- Why your researchers will benefit by creating an ORCID iD and connecting their iDs to your system.
- How ORCID benefits the wider, global research community.
We will be continually building out this “library” of resources based on feedback from the community. If you have an idea for something you might like to see, please feel free to contact us.
Integrating ORCID into your system allows your organization to collect authenticated ORCID iDs and add them to your own data. At the same time, the researcher provides the organization permission to read and write to and from their ORCID record.
To make this work, organizations MUST obtain authenticated ORCID iDs using the ORCID OAuth API. This means they include an ORCID branded button or link within their system, that when clicked, asks the user to sign in to their ORCID record.
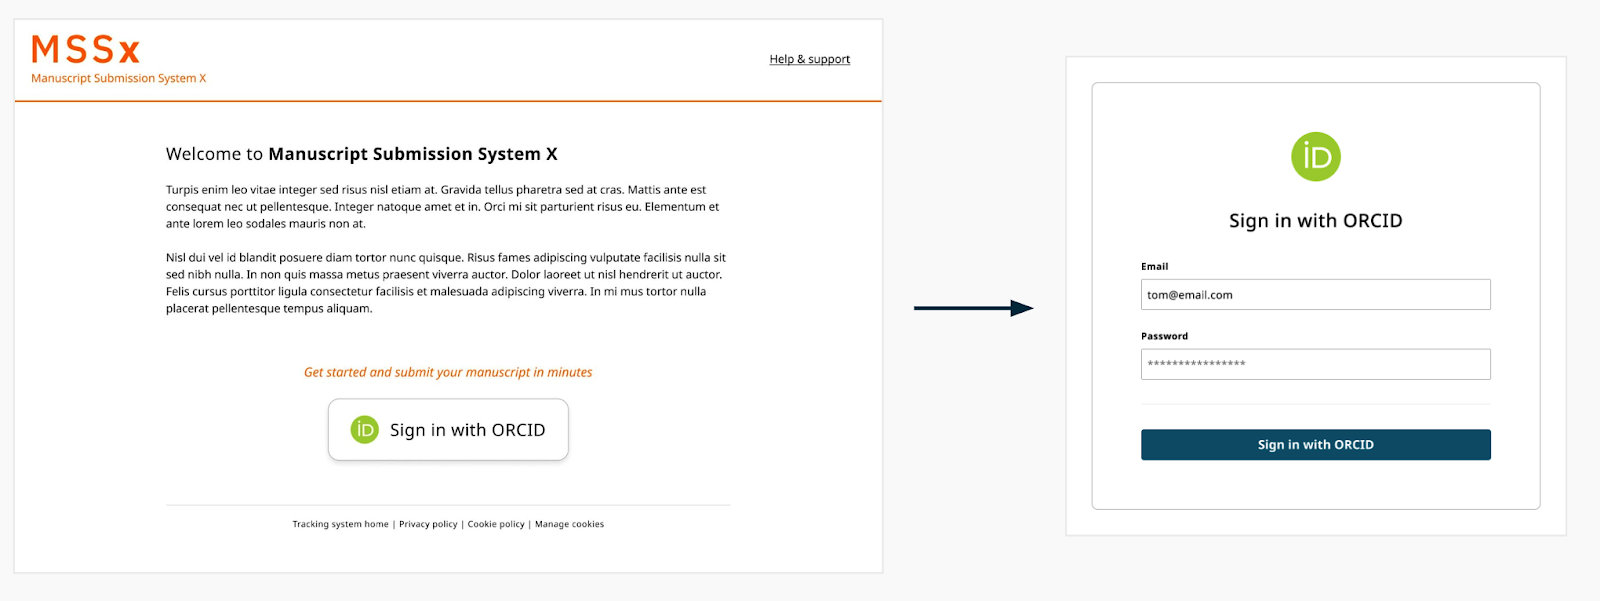
Once signed in, the user will be asked to authorize access to the system asking for their ORCID iD
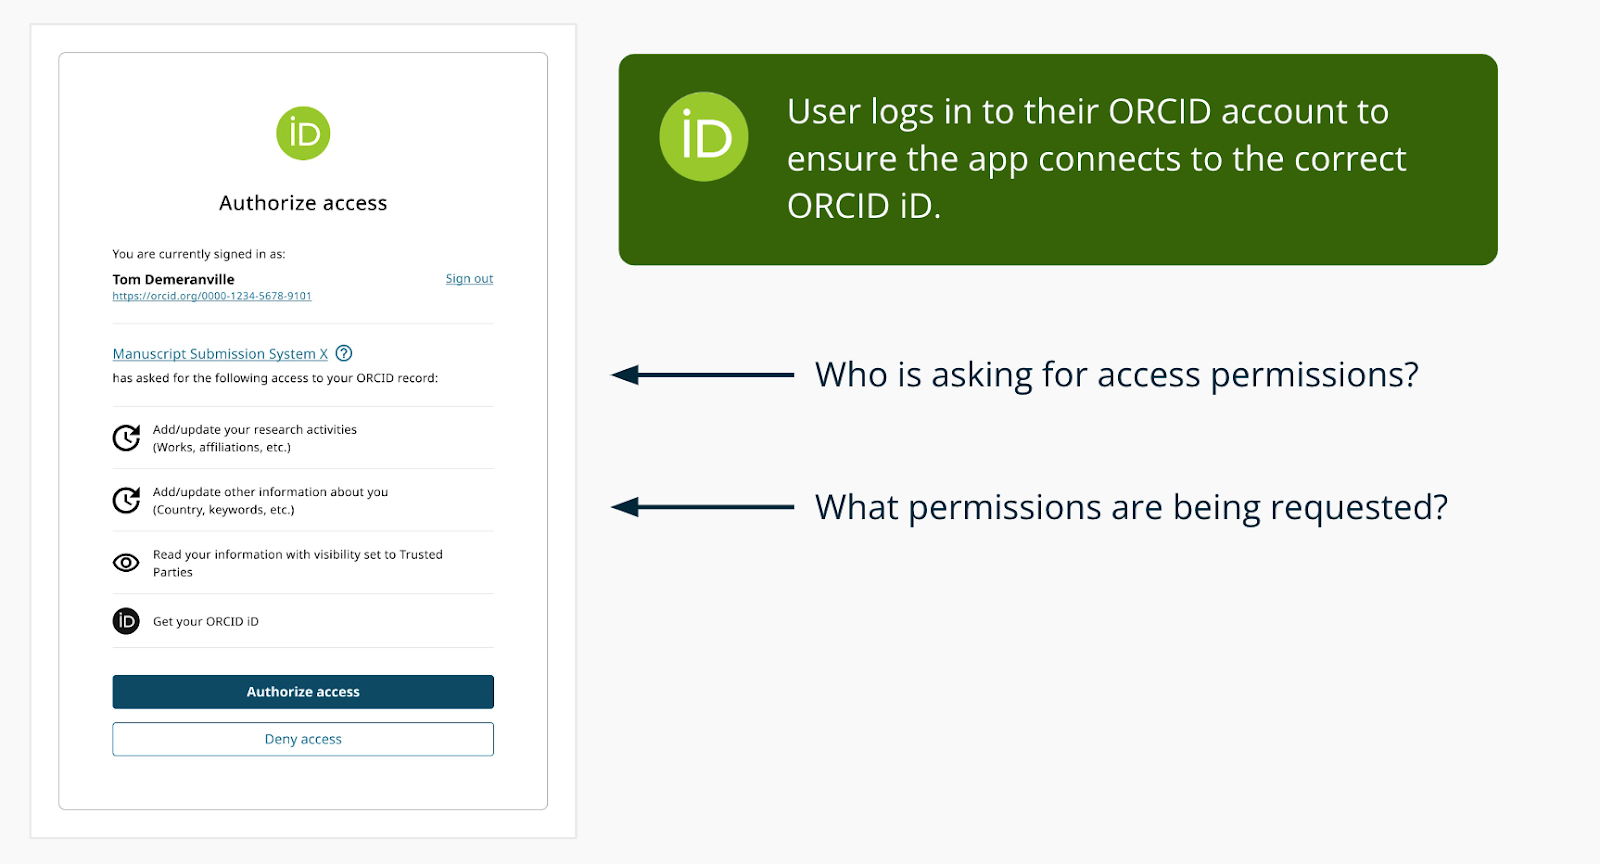
The user’s ORCID iD and name on the ORCID record (depending on visibility settings) is returned to the organization as part of this process. The system can then request additional data from the ORCID API.
The above described workflow for collecting authenticated APIs is available in both ORCID’s public and member APIs. The former is available for use free of charge by non-commercial services.
The process to get permission to add or update data on a user‚s ORCID record uses OAuth, as described in our 3 Legged OAuth FAQ. Only ORCID members can use the Member API to ask for update permissions. In simple terms it works like this:
- Your local system creates a special link
- When clicked, the user is sent to ORCID, signs in and grants permission
- ORCID sends the user back to your system with an ‘authorization code’
- Your system exchanges that code for an ‘access token’
- The access token lets you update the user’s record
ORCID strives to enable transparent and trustworthy connections between researchers, their contributions, and their affiliations by providing a unique, persistent identifier for individuals to use as they engage in research, scholarship, and innovation activities. Ensuring that the correct ORCID iD is associated with the right researcher is a critical step in building the trustworthiness of the ORCID dataset and the broader scholarly communications ecosystem. For this reason, ORCID does not permit the manual collection or entry of ORCID IDs in any workflow where it is possible to collect ORCID IDs directly from record holders themselves.
Researchers can easily and securely share their ORCID iDs with the systems they interact with, which proves they own their ORCID iD. Those systems can then share information about researcher activities with other systems, which creates a chain of validated and trusted assertions about researcher activity. The end result is that the correct person is associated with the correct activities across a broad range of scholarly information workflows.
For more information see: https://info.orcid.org/collecting-and-sharing-orcid-ids/
I have developed my integration using the Sandbox, how do I get Production Member API credentials?
Member organizations request ORCID Member API credentials on the production (live) server by completing the Production Member API client application form. Before issuing production Member API credentials, the ORCID Engagement team/Consortia Lead will review a demo of your integration in the ORCID sandbox. This gives us a chance to see the great integrations you have built and offer workflow improvements, as well as check that all integrations meet our best practices and minimal requirements for launch.
To provide a demo of your system you’ll need to set up a working integration with the ORCID sandbox that the ORCID team can preview. There are a few ways to share your working sandbox integration:
- Recommended: Live demo: Contact us to schedule a live demonstration. We’ll provide meeting software that allows you to share your screen for you to demo your integration.
- Test site: If your development site is public, send us the URL along with test credentials (if needed) to access your system and instructions describing how to use your system’s ORCID features. Provide additional documentation to verify what we would not be able to see from the user end, e.g. API version used, what data is stored by your system, etc.
- Screencast or screenshots :Send a recording or a set of screenshots with descriptions clearly explaining and demonstrating how your integration works at each step, including what happens if a user denies access or disconnects their iD. Be sure to provide additional documentation to verify anything we would not be able to see from the user end, such as API version used and how data is stored
- Title:* The title of the work
- Subtitle: A subtitle to the work
- Translated-title: The title the work appears under in another language, the language of the translated title is recorded as an attribute
- Journal-title: The name of a larger collection the work belongs to, such as a journal for journal articles or a book for book chapters. Even though this is labelled journal title it can be used for other works
- Short-description: A brief description or abstract of the work
- Citation-type: The format the citation is provided in. This field is selected from a list containing the following values: APA, BIBTEX, CHICAGO, HARVARD, IEEE, MLA, RIS, UNSPECIFIED, VANCOUVER
- Citation-value: The contents of the citation
- Work-type: The type of object the work is. This field must be selected from the supported work types
- Publication date: The date the work was published. We recommend the earliest publication date is used
- External-id-type:* The type of identifier. This field must be selected from the supported work identifiers
- External-id-value:* The identifier itself
- External-id-url: A url the identifier resolves to
- External-id-relationship:* Identifiers that apply only to the work being added would be marked as Self. Identifiers that apply to a larger collection this work belongs to would be set to Part-of. Identifiers that apply to alternate versions of the work would be set to version-of. Identifiers that apply to the funding for the work would be set to funded by.
- Work-url: A url linking to the work
- Work-contributors: Information about the individuals who created the work
- Language-code: The language used to describe the work in the previous fields
- Country: A country the work was published in or otherwise associated with
* Indicates required field
Technical documentation
A more detailed tutorial can be found here.