Access to the ORCID Public API requires a set of credentials consisting of a Client ID and a Client Secret. This guide describes the steps needed to obtain ORCID Public API credentials. ORCID members need not register for the public API as their member credentials can be used instead. To register for member credentials see Register a client application.
Public API credentials are tied to an individual’s ORCID record and cannot be transferred to another person. You will need to agree to the Public client terms of service before credentials are issued.
Organizational API credentials are available to organizations that support ORCID through a paid membership subscription. Learn more about ORCID membership.
We recommend that developers test the Public API in the sandbox testing server before using the production version.
We recommend that developers test the Public API in the sandbox testing server before using the production version. Below are the steps on how to register for public API credentials in both the Sandbox and Production environments.
- Sign into your ORCID record:
Production server: https://orcid.org/signin
Sandbox testing server: https://sandbox.orcid.org/signin - Click on your name in the top right hand corner
- Click Developer Tools from the menu option
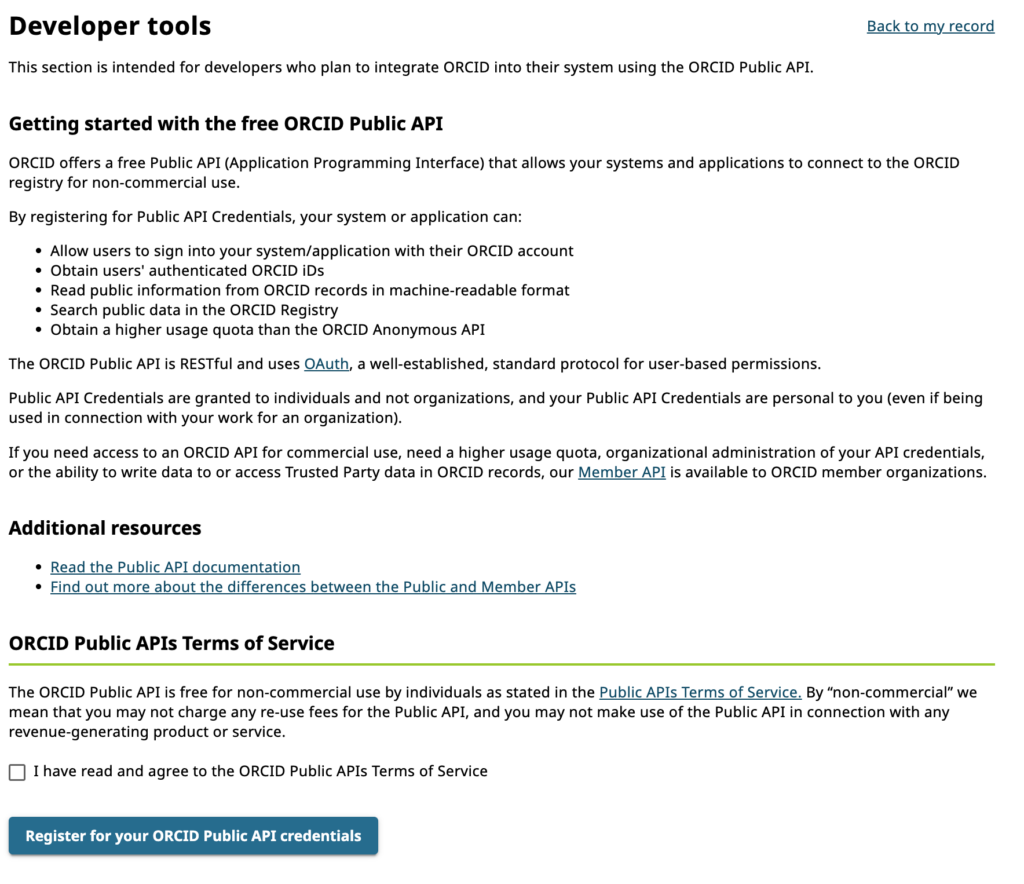
Note: In order to access Developer Tools, you must verify your email address. If you have not already verified your email address, you will be prompted to do before you can register for public API credentials - Read and agree to the ‘ORCID Public APIs Terms of Service
- Click the “Register for ORCID Public API Credentials” button.
Completing the Application Details Form
- Once you have registered for your Public API Credentials you will be directed back to Developer Tools (https://orcid.org/developer-tools or https://sandbox.orcid.org/developer-tools).
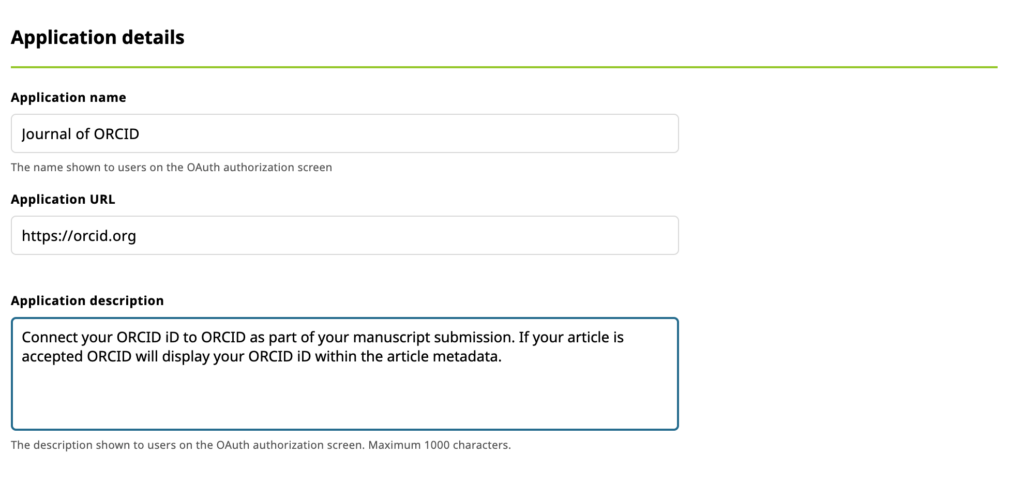
- You need to complete the application details form presented to register a new application.
- Name: The name of your application. This will be displayed to users when they grant your application permission to get their ORCID iD, and it will be displayed in their Trusted organization list. We recommend using the name of your organization or service (e.g. a journal name).
- Application URL: The website the user can visit to learn more about your application. This will also be displayed in their Trusted organization list.
- Application Description: Information about the application that you are developing and how you will use the user’s ORCID iD. This will be displayed to users on the OAuth screen.
Adding Redirect URIs
Once the user has authorized your application, they will be returned to a URI that you specify. You must provide these URIs in advance or your integration users will experience an error.
- Enter your redirect URI in the box provided
- If you need to enter more than 1 redirect URI, click ‘Add another redirect URI’
Please note:
- Only HTTPS URIs are accepted in production
- Domains registered MUST exactly match the domains used, including subdomains
- Register all redirect URIs fully where possible. This is the most secure option and what we recommend. For more information about redirect URIs, please see our redirect URI FAQ
Saving your application
Once you have completed the application form and added your redirect URIs you can save your application.
- Click ‘Save my application and generate my client ID and secret’
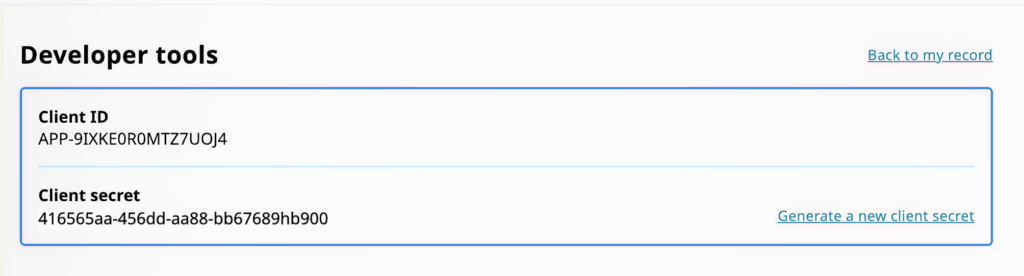
You will be directed back to the developer tools page which will now include your Public API client credentials
Updating your credentials
Making a change to your application information is very simple.
- Edit the relevant information and then click ‘Save application’
Use your credentials
Now that you have your credentials, it’s time to start using the ORCID Public API!
Please note that we can transfer your credentials to the member API if you become an ORCID member in the future.
ORCID supports different API usage quota and rate limits depending on the API that you are using.
| API | Rate Limit | Usage Quota |
|---|---|---|
| Anonymous API | 12 req/sec40 burst/sec | 25k reads/day (Per IP address) |
| Public (registered) API | 12 req/sec40 burst/sec | 100k reads/day (per Client ID) |
| Member API | 24 req/sec40 burst/sec | No Usage Quota |
Requests a second are the number of requests that can be made a second.
Bursts are the number of requests we will allow to be queued before rejecting. Requests in the queue are slowed down to the rate of requests a second. If you exceed the burst, you will get a 503 response.
If you exceed the usage quota then you will be blocked from making further requests within the timeframe.
Please remember that the ORCID Public API is free for non-commercial use by individuals as stated in the Public APIs Terms of Service. By “non-commercial” we mean that you may not charge any re-use fees for the Public API, and you may not make use of the Public API in connection with any revenue-generating product or service.
Using the Public API with client credentials will allow your integration a higher usage quota than the anonymous API. Please see our integration guide on how to register a public API client.
If you are regularly exceeding the API usage quota for the Public API then we would recommend you consider becoming an ORCID member for access to our Member API. Not only will it allow you to access a higher rate limit and an unrestricted usage quota, but you will be able to access Trusted Party data in ORCID records and contribute data to ORCID records from your institutional systems with the users permission.